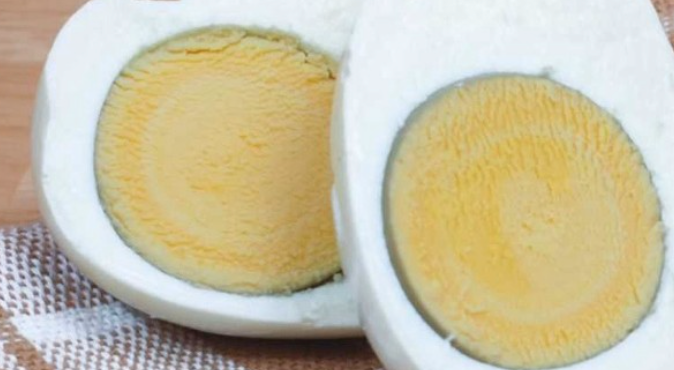
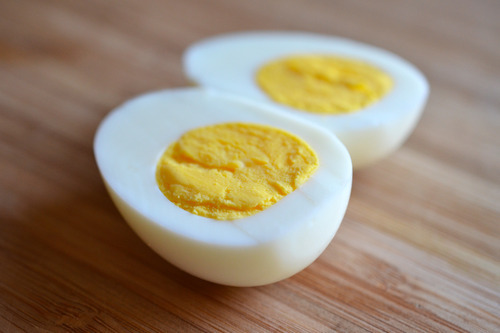
Eggs are a universal staple in many diets around the world. Packed with protein and free of sugar, they are not only nutritious but also versatile. Whether you’re having breakfast, lunch, dinner, or even just a snack, eggs can fit seamlessly into any meal. Among the various ways to prepare eggs, hard-boiled eggs are particularly popular for their simplicity and convenience. However, there’s one common issue that many people encounter when making them—a green ring around the yolk. While it might look unappetizing, the good news is that this discoloration is avoidable, and it’s completely within your control.
Why Does a Green Ring Form Around the Yolk?

First things first—what exactly causes that greenish ring to appear on your hard-boiled eggs? The answer lies in the chemistry of the egg itself.
When you boil an egg, hydrogen sulfide from the egg white reacts with iron in the yolk. This chemical reaction typically occurs when the egg is overcooked, causing the yolk to develop a green or gray ring. While the ring may look off-putting, it’s harmless and doesn’t affect the egg’s taste or nutritional value.
However, it’s still something most people prefer to avoid for aesthetic reasons, especially if you’re serving hard-boiled eggs at a party or gathering. Luckily, once you understand why the green ring happens, you can easily avoid it.
The Key to Perfect Hard-Boiled Eggs: Timing
The number one reason for the appearance of the green ring is overcooking. Eggs that spend too long in boiling water or sit too long in hot water after being boiled will develop that greenish hue.
So, how do you avoid it? The trick is to time your cooking just right. While there are varying opinions on the perfect cooking time, most experts agree that 10 to 12 minutes is ideal for hard-boiled eggs. Any longer than that, and you risk overcooking them, which leads to the sulfur-iron reaction causing the discoloration.
How to Boil Eggs Without Getting a Green Ring
Now that you know what causes the green ring and the importance of timing, let’s dive into the step-by-step process of boiling eggs to perfection. Here’s how to ensure your hard-boiled eggs turn out flawlessly every time:
- Start with Fresh Eggs
Fresh eggs make for better hard-boiled eggs, so try to use eggs that are no more than a week old. However, slightly older eggs (but not too old!) tend to peel more easily after boiling. - Place the Eggs in Cold Water
Always start by placing your eggs in a pot of cold water before turning on the heat. Make sure the eggs are fully submerged, with about an inch of water above them. - Bring to a Boil
Once the eggs are in the pot, bring the water to a rolling boil over medium-high heat. As soon as the water reaches a full boil, reduce the heat to low and let the eggs simmer gently. - Set the Timer for 10-12 Minutes
Here’s where timing is everything. Once the water begins boiling, set your timer for 10 to 12 minutes depending on how firm you like your yolks. For softer yolks, 10 minutes should suffice, while 12 minutes will give you a fully firm yolk. - Remove from Heat and Cool Immediately
As soon as the timer goes off, remove the pot from the heat and immediately transfer the eggs into a bowl of ice water. Cooling the eggs quickly prevents them from continuing to cook, which is crucial for avoiding the green ring. Let them sit in the ice water for at least 5 minutes. - Peel and Enjoy
Once your eggs are cooled, gently tap them on a hard surface and roll them to loosen the shell. The cold-water bath should make peeling much easier. Peel and enjoy your perfectly cooked, green ring-free hard-boiled eggs!
Tips for Extra Perfection

While the basic steps above will give you great results, here are a few extra tips to take your egg-boiling game to the next level:
- Don’t Skip the Ice Water Bath: This step is key to preventing overcooking. Cooling the eggs rapidly ensures that they stop cooking the moment they leave the pot.
- Use a Timer: Whether it’s your phone or an old-fashioned kitchen timer, don’t rely on guesswork. Timing is the most critical factor in avoiding that greenish ring.
- Add Baking Soda to the Water: Some people add a pinch of baking soda to the boiling water. This helps to slightly alkalize the water, making the eggs easier to peel once cooked.
Common Mistakes to Avoid
While cooking hard-boiled eggs seems straightforward, there are a few common mistakes that can lead to overcooking or rubbery textures. Here are the most frequent missteps to watch out for:
- Boiling Eggs for Too Long: Overcooking is the main culprit behind the green ring. Stick to the recommended time frame to avoid this.
- Skipping the Cold Water Bath: If you don’t cool the eggs quickly, the residual heat will continue to cook them, which could result in the dreaded green ring.
- Using High Heat Throughout: Bringing the eggs to a boil is important, but once the water is boiling, turn the heat down to avoid over-agitating the eggs. Simmering gently helps produce a better texture.
Final Thoughts: How to Make Hard-Boiled Eggs Perfect Every Time
Hard-boiled eggs are a fantastic addition to any meal, whether you’re having them for breakfast, adding them to salads, or preparing them as a snack. However, that green ring around the yolk can be a real turn-off. Fortunately, by following a few simple steps—especially paying attention to timing and using an ice water bath—you can easily avoid this issue and get perfect hard-boiled eggs every time.
Now that you know the secret to preventing the green ring, you can confidently make your hard-boiled eggs without any fear of discoloration. So, the next time you’re whipping up a batch, set your timer, cool them quickly, and enjoy your perfectly cooked eggs!


